
Assessments
When you assign a scenario to a course, it becomes an assessment.
Each assessment has:
- A scenario
- Rubrics (by default these come from the scenario but can be changed)
- A title (which can be different from the scenario title)
- Instructions (optional)
- A due date (optional)
Creating an assessment
Section titled “Creating an assessment”You can assign a scenario one of two ways:
- From the scenario: Click the “Assign” option on a scenario to assign it to a course.
- From the course: In the “Assessments” tab, click the Assign a scenario button to choose one of your scenarios to assign.
This will bring you to the screen to create a new assessment, where you can pick the assessment title, set optional instructions, set an optional due date, and review or change the rubrics before assigning.
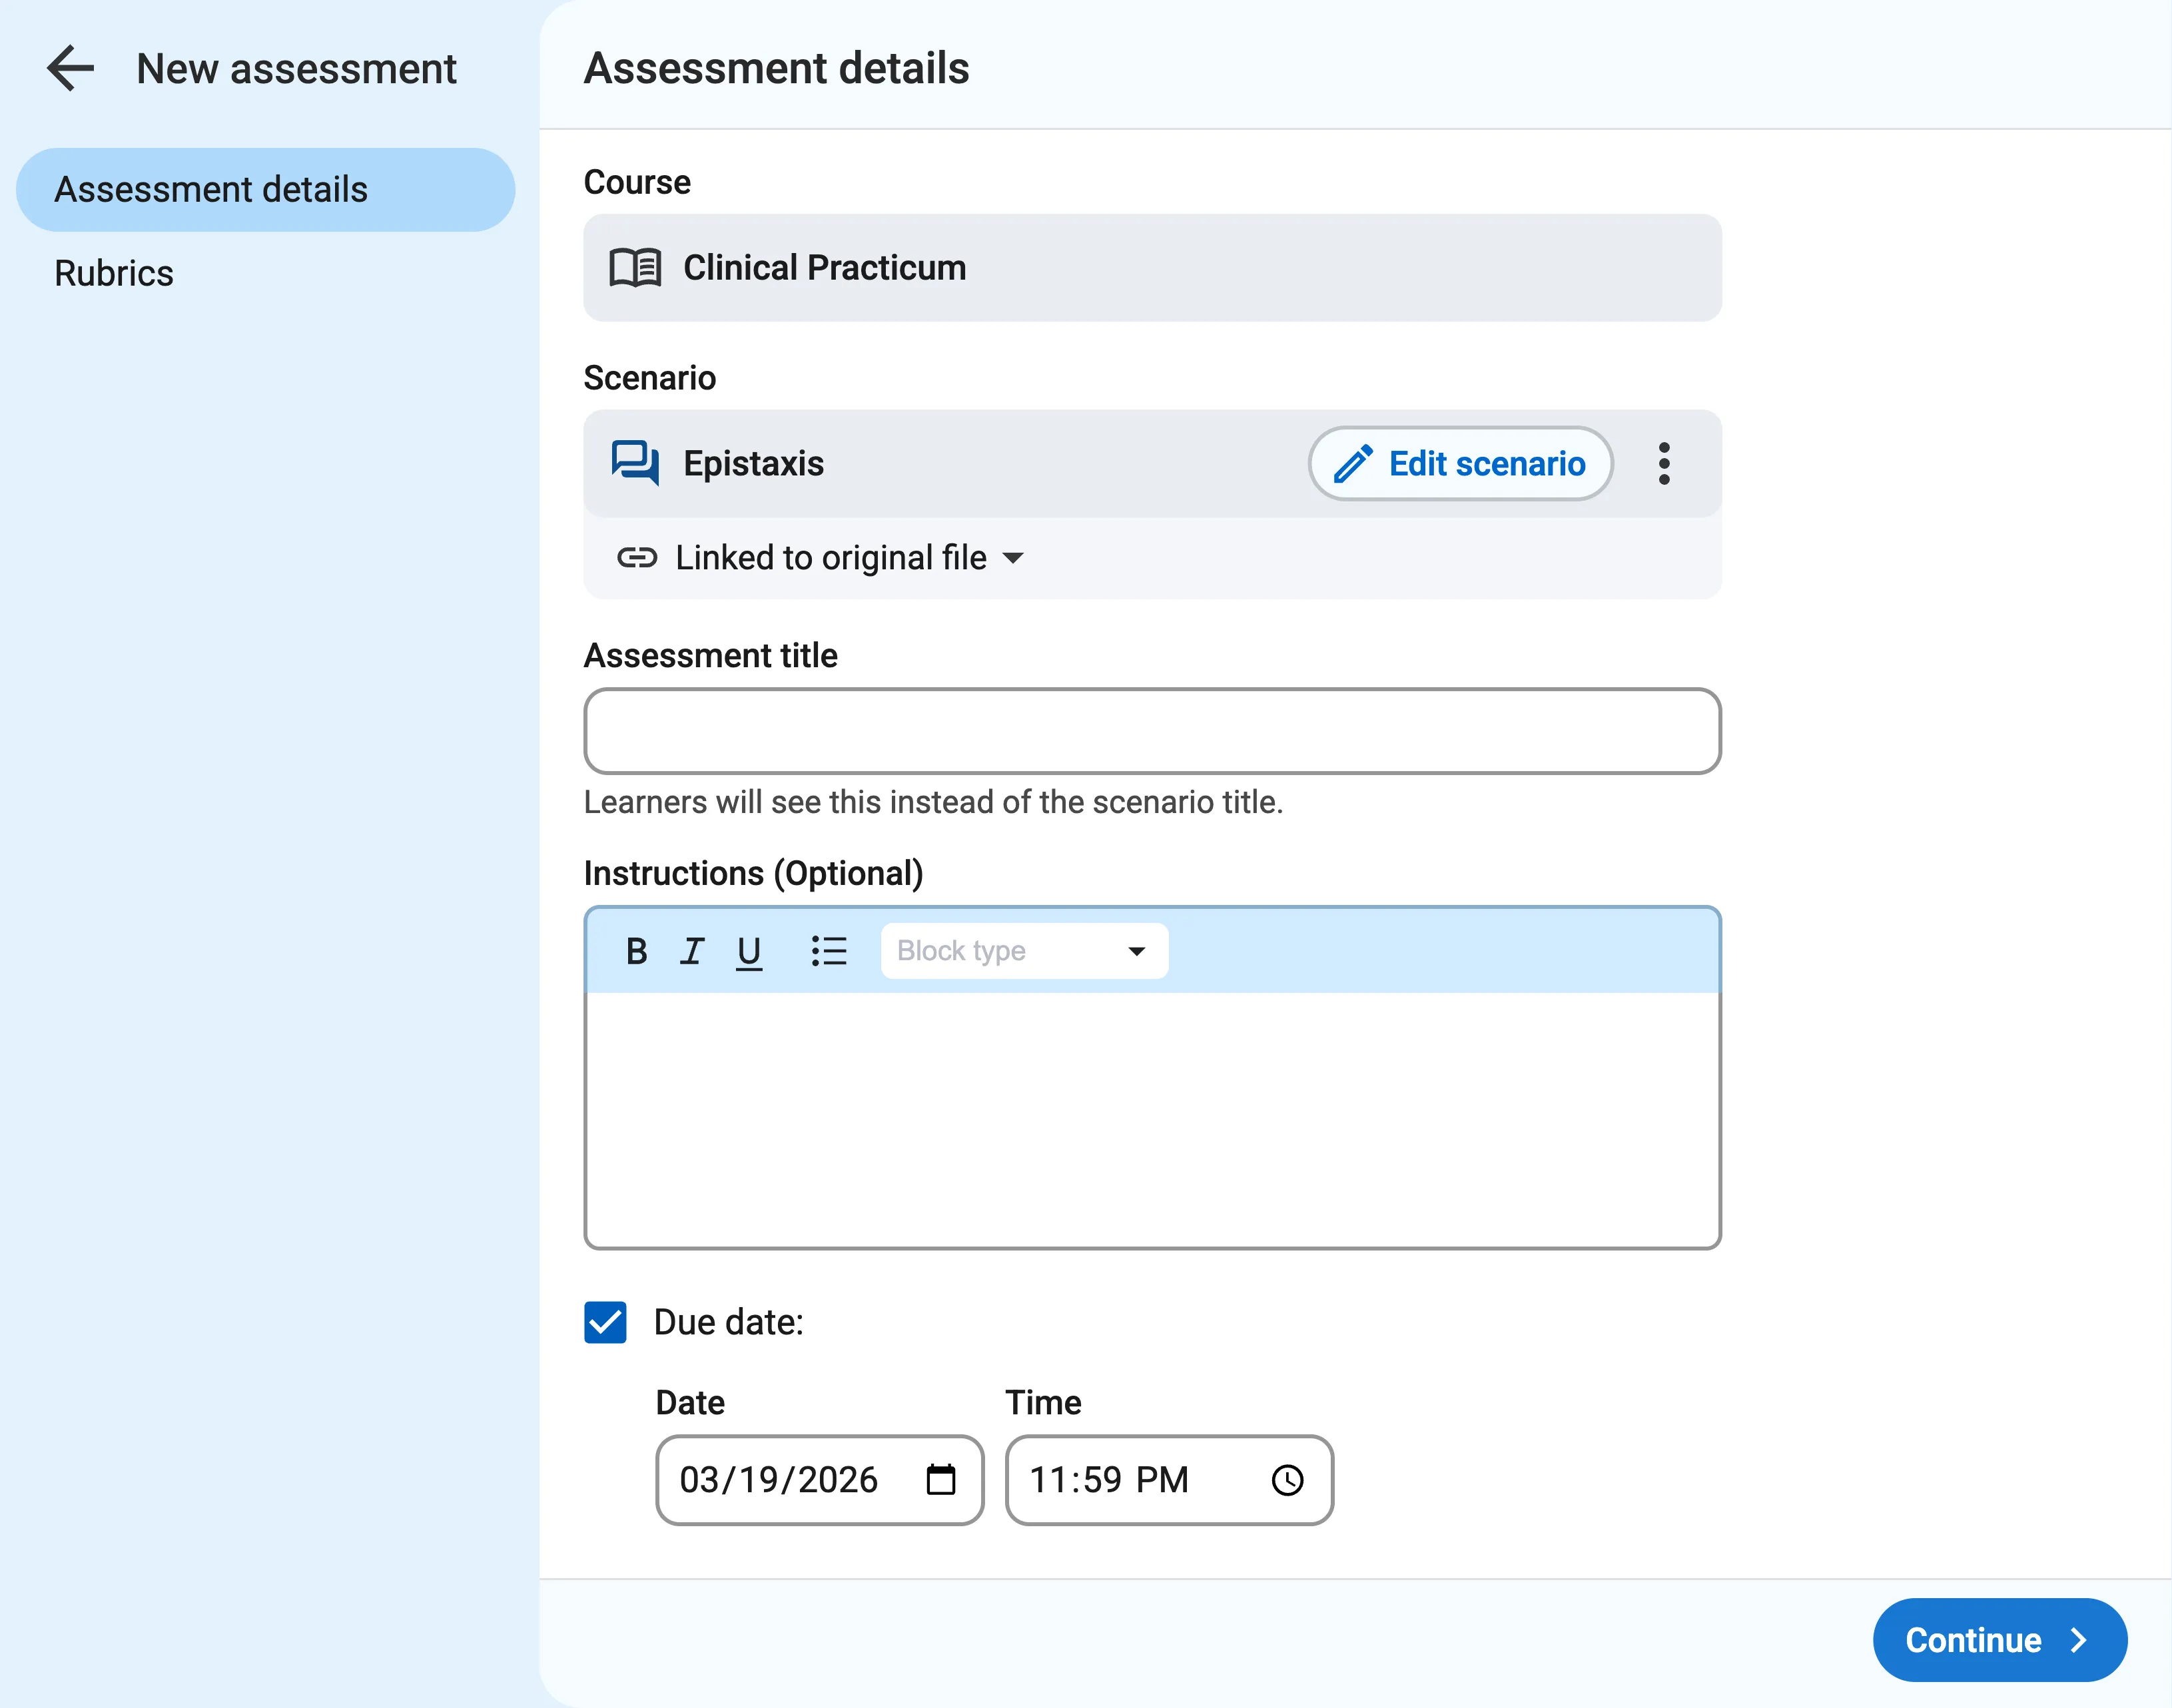
When you change the rubrics for an assessment, it’s saved for just that assessment and won’t affect the rubrics included in the scenario.
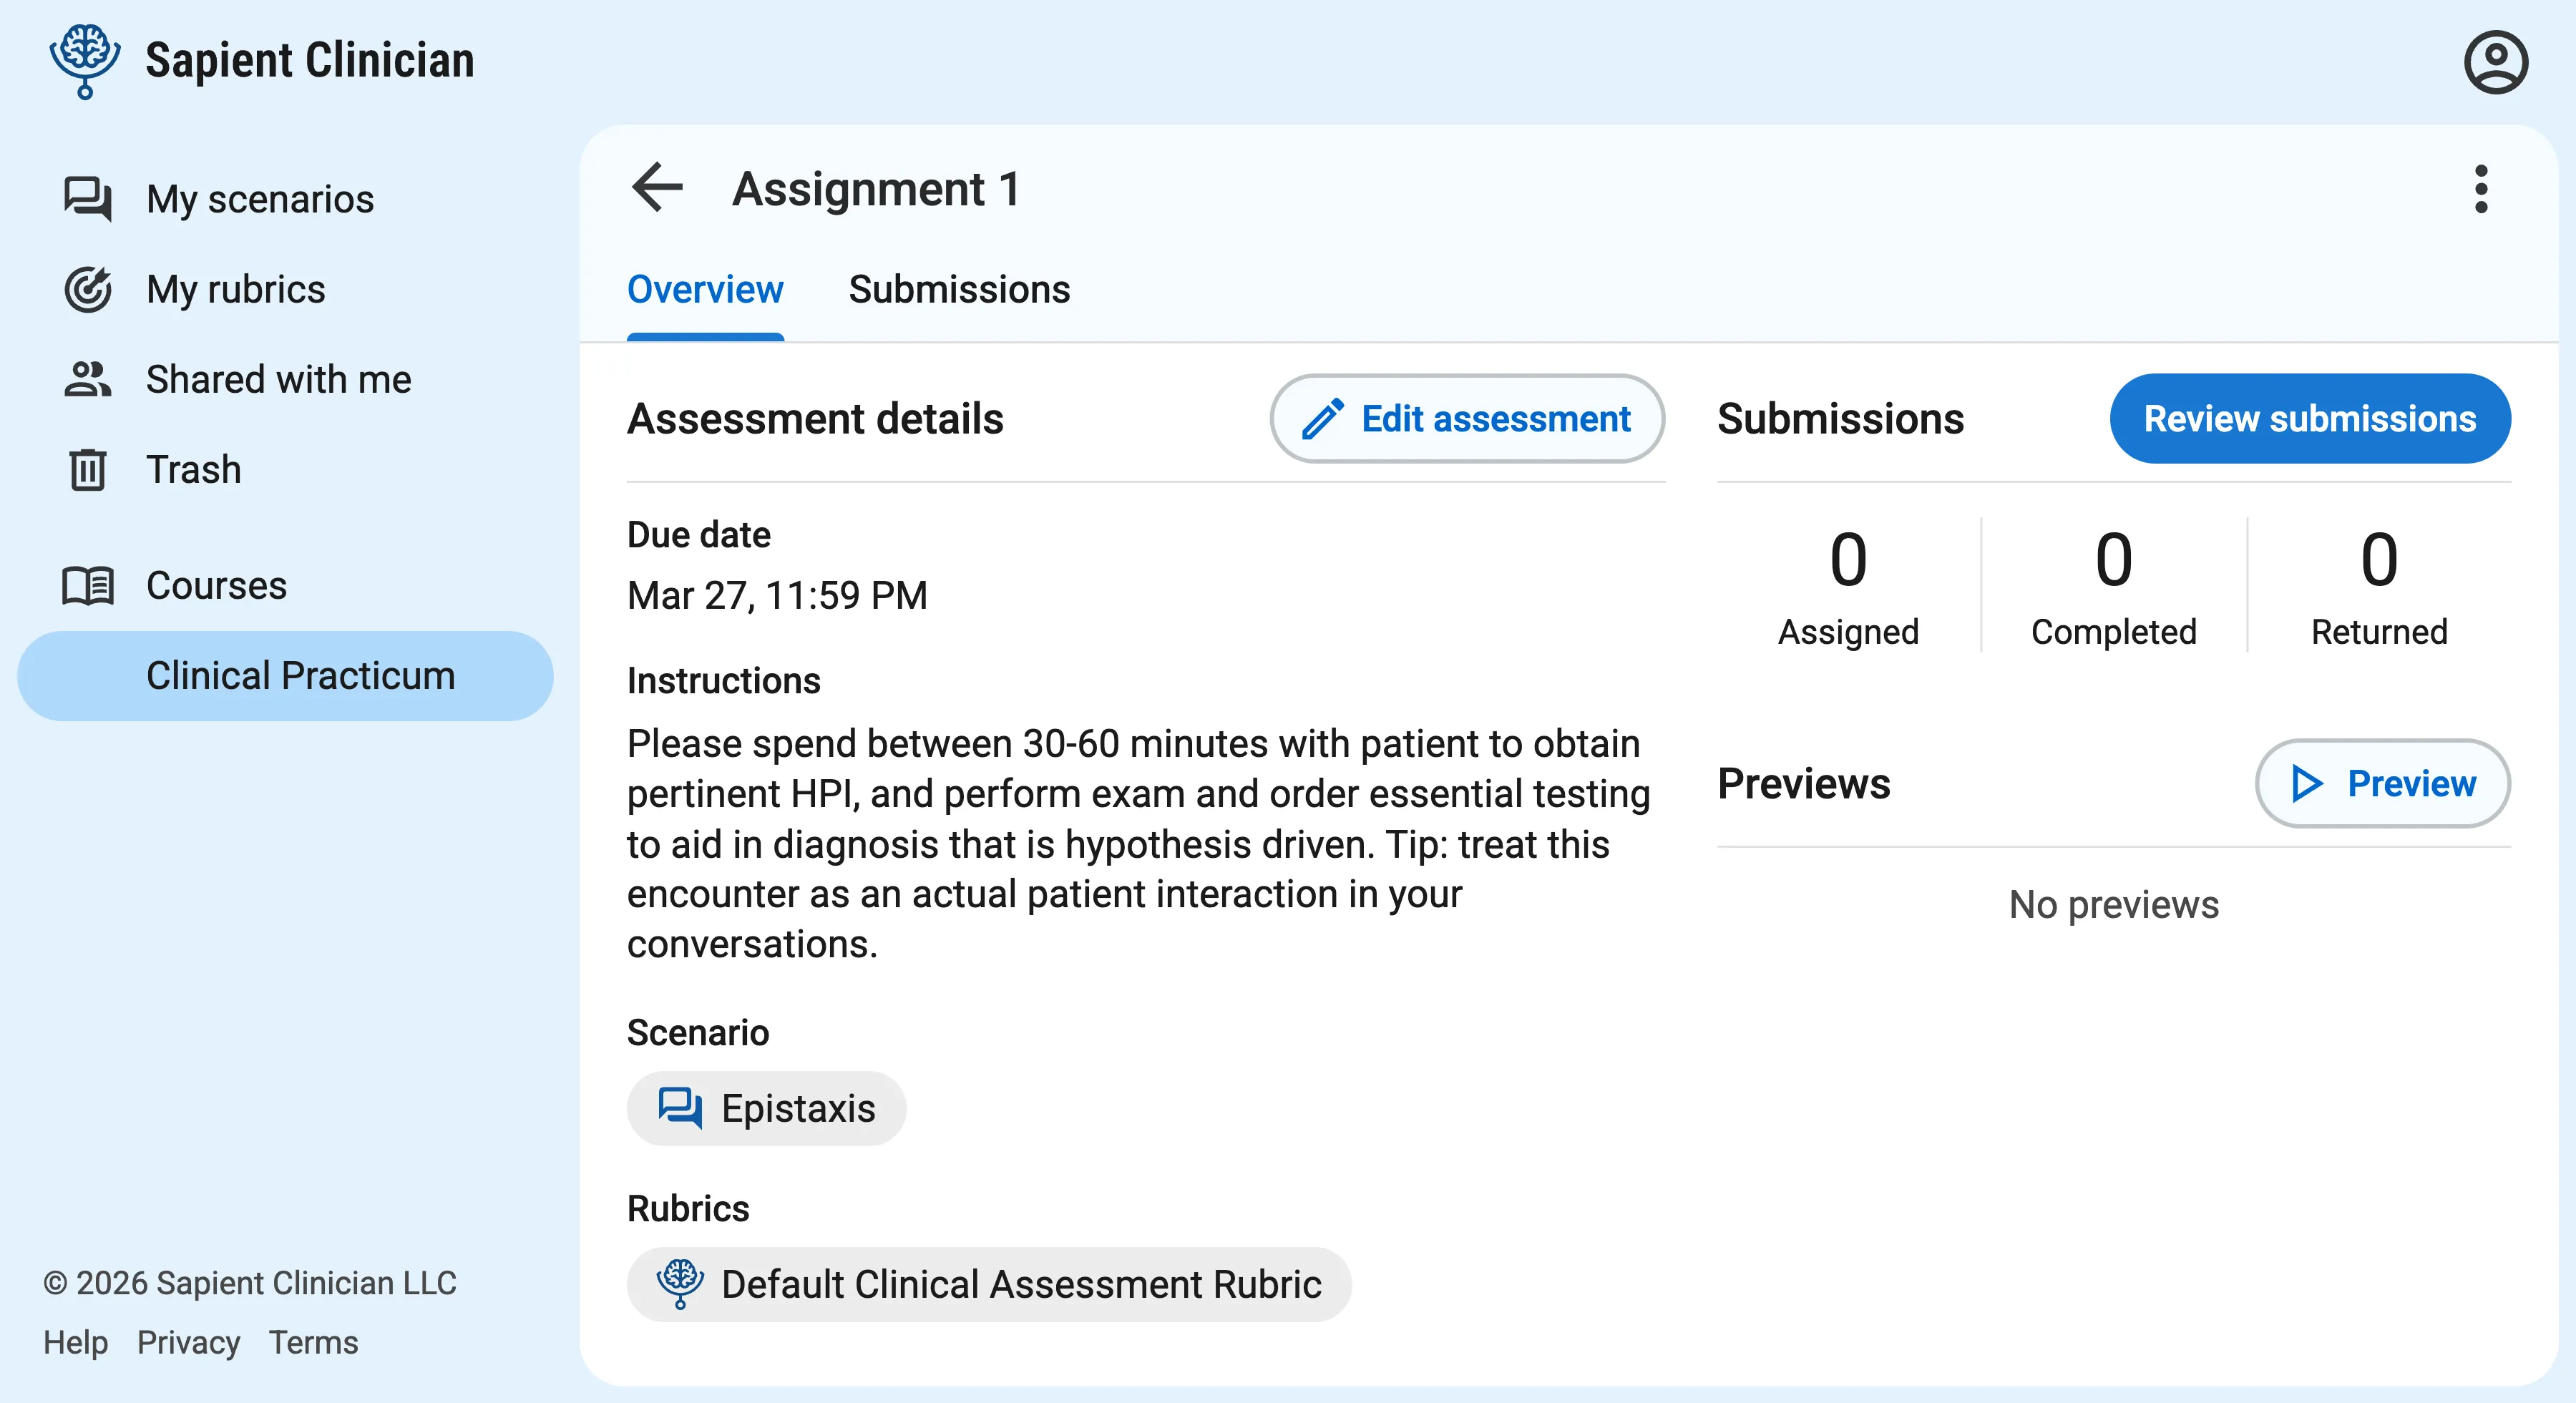
Viewing student submissions
Section titled “Viewing student submissions”Click on an assessment to visit the assessment overview page. This page contains the assessment details, and on the right side of the page you’ll see submission statistics. Click the Review submissions button to view the list of learners in your course and their completion status on this assessment.
Click on a completed submission to review the learner’s transcript and feedback. Use the dropdown at the top right of the screen to quickly switch between learners.

If you’ve opted to review and return feedback manually, you can do that from this screen. Learn more about feedback: